
I’ve taken thousands of makeup photos, and I can tell you the most common reason makeup photos look off is not the foundation, not the eyeshadow, and not your phone. It’s light. Bad light flattens your features, adds shadows where they don’t belong, and changes every color you spent twenty minutes applying.
The good news is light is also the easiest thing to fix — once you know what to look for. These are the three light fixes I teach every client before I take their after photo. No pro camera, no ring light, no editing app. Just your face, a window, and a few small adjustments.
The Problem With Overhead Light
Most of us get ready in bathrooms lit by overhead bulbs. That light comes from above, which means it casts shadows straight down: under your eyes, under your cheekbones, under your lip. It makes your under-eye area look darker, your nose look longer, and your skin look uneven.
The same thing happens in kitchens, hallways, and offices. Overhead light is fine for finding your keys. It’s terrible for showing your makeup.
The Fix: Find a Window
Natural light from a window comes from the side or slightly above, and it’s diffused enough to wrap around your face instead of cutting into it. Stand facing the window, not beside it, and definitely not with your back to it.
I take most of my client photos in front of a large north-facing window in my studio. It gives me even, soft light that shows the true texture and color of the makeup. At home, any window works — just pull a chair up to it and face the glass.

The Backlight Mistake
If you stand with a window behind you, the camera sees all that bright light and darkens you to compensate. Your face becomes a silhouette, and your makeup disappears. This is the number one mistake I see in selfies taken in cars, bedrooms, and cafés.
Backlight also fools your phone’s auto settings. It thinks the scene is too bright, so it darkens everything — including the very face you’re trying to show.
The Fix: Face the Light, Always
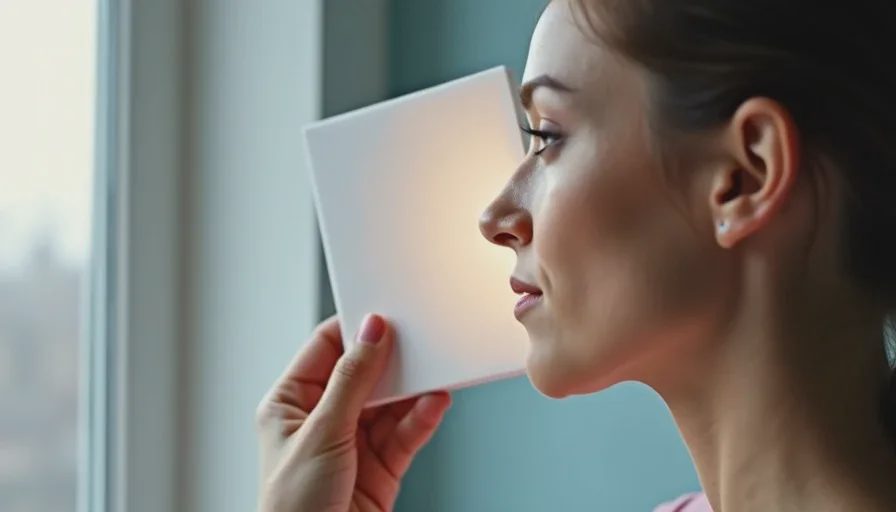
Your light source should be in front of you or at a slight side angle. If you only have a window behind you, turn around. If you can’t turn, use a white wall or a piece of paper to bounce some of that light back onto your face.
I keep a small white foam board in my travel kit for exactly this. It costs less than five dollars, and it bounces window light into the shadow side of the face. When I’m shooting a client in a dark hotel room, that board saves more photos than any filter.
Mixed Light and Color Casts
Your phone tries to balance color, but when there are two different light sources — say, a warm lamp on one side and a cool window on the other — it gets confused. The result is skin that looks yellow on one side, blue on the other, and makeup colors that don’t match what you saw in the mirror.
Bathroom bulbs are often warm. Phone screens are cool. Daylight is neutral. Mix them, and your foundation shade can look completely wrong in the photo even when it’s perfect in person.
The Fix: One Light Source at a Time
Turn off the lamp. Turn off the overhead. Pick one light source — ideally the window — and shoot with that alone. If you’re indoors at night, use one soft lamp placed in front of you, not above, and turn off any other lights in the room.
When I photograph makeup on the road, I close the curtains and turn off every room light, then open the curtain halfway so the window is the only source. It takes thirty seconds, and the difference is immediate.
What I Leave in the Photo
I don’t edit out skin texture. I don’t smooth pores or blur fine lines. The whole point of taking a makeup photo is to see what it actually looks like — and if I edit all that away, I’m not showing you the truth.
When the light is right, you don’t need to filter. The light already did the work. Your skin looks like skin. Your eyeshadow looks the same shade it does in person. Your foundation doesn’t look orange or gray. That’s the goal: a photo that looks like you.
The One Adjustment That Takes Two Seconds
Before you press the shutter, hold the phone at eye level or slightly above. If the camera is below your chin, you get a distorted angle and a forced double chin. If it’s too high, you lose your jawline. Eye level or a touch above is where most faces look natural.
Then, tap the screen where your face is. That tells your phone to expose for your skin, not the background. This one tap changes everything.
The Real Secret
You don’t need a new phone. You don’t need a ring light. You need to understand where the light is coming from and put it in front of you, not above or behind you. Once you do that, your makeup photos will start to look the way your makeup actually looks — like you, on a good day, in good light.
That’s the version I want you to see. And it’s already there.


No notes yet — write the first one.